Telephone: 408-839-5569
Email: (Click Here) Andrew@JaguarSpecialties.com
Last Update 7-2-24
|
Our 1988 XJSC goes LS, and and
some other things are happening too..... XJSC LS Upgrade, Part 3 Go on to XJSC LS Upgrade Part 4, Click Here Go on to XJSC LS Upgrade Part 5, Click Here April 2019
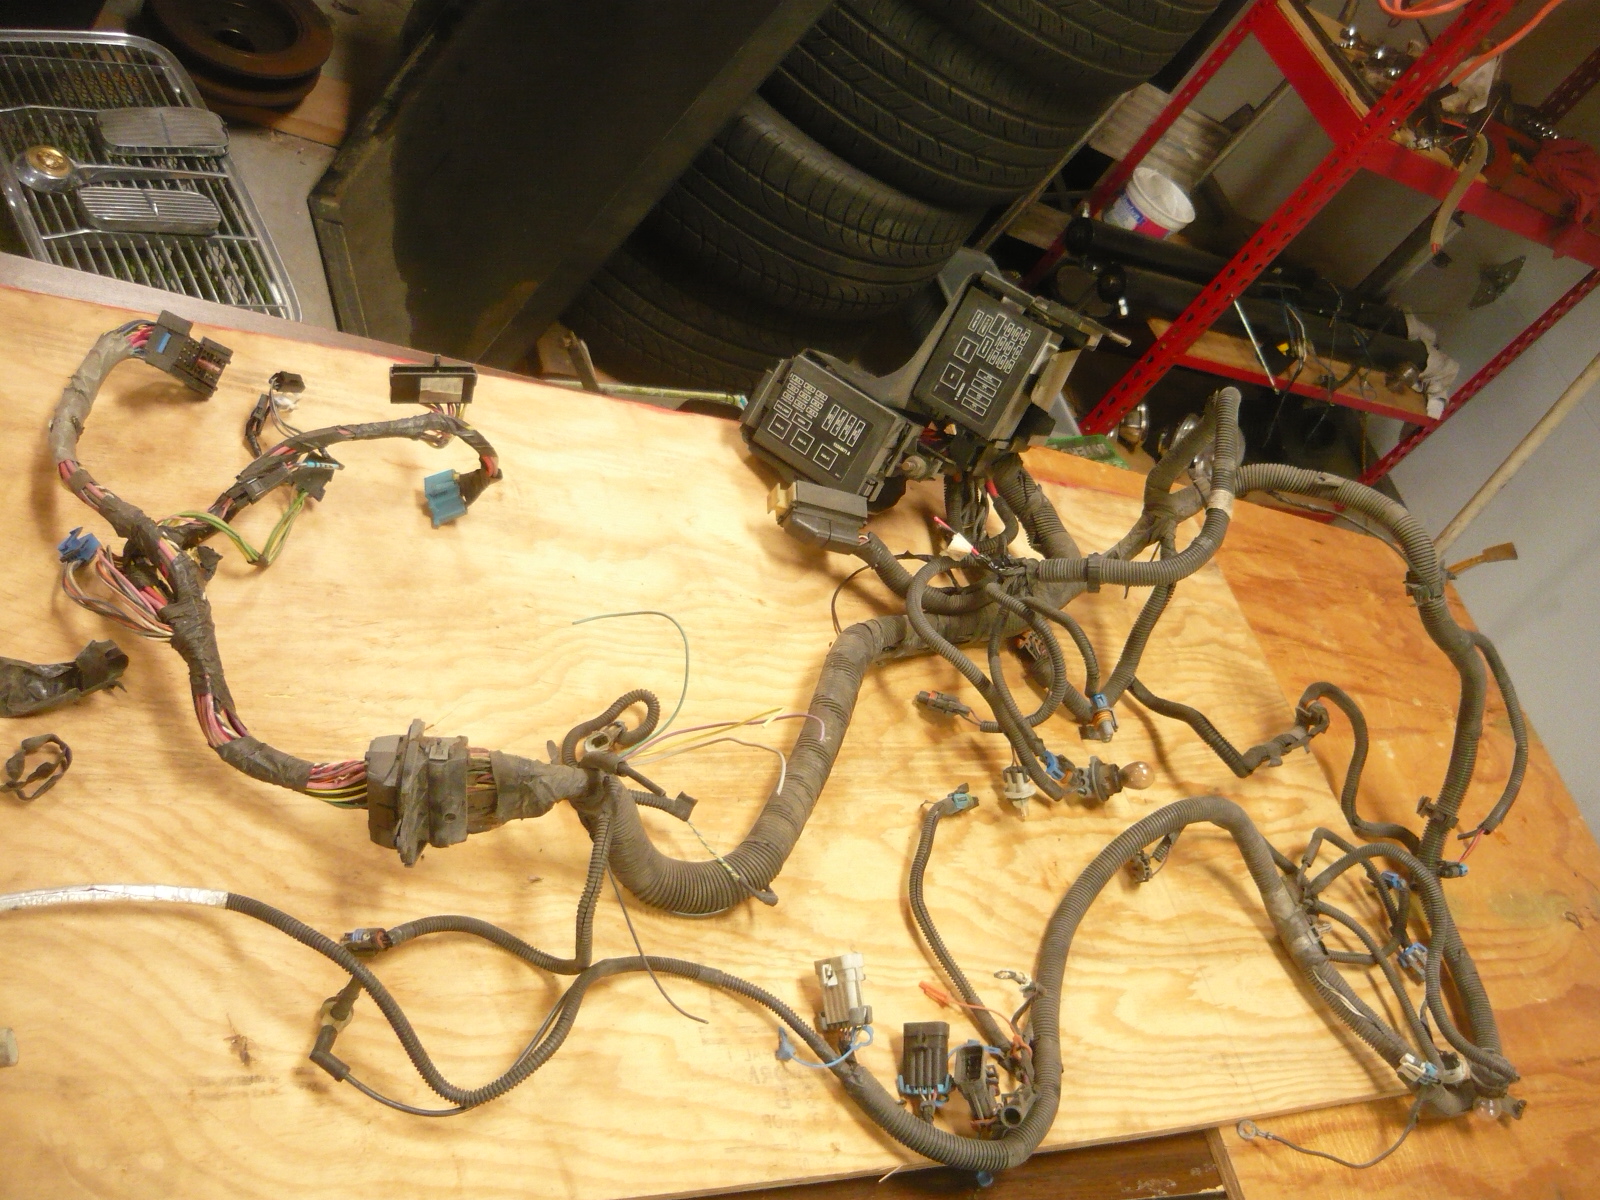
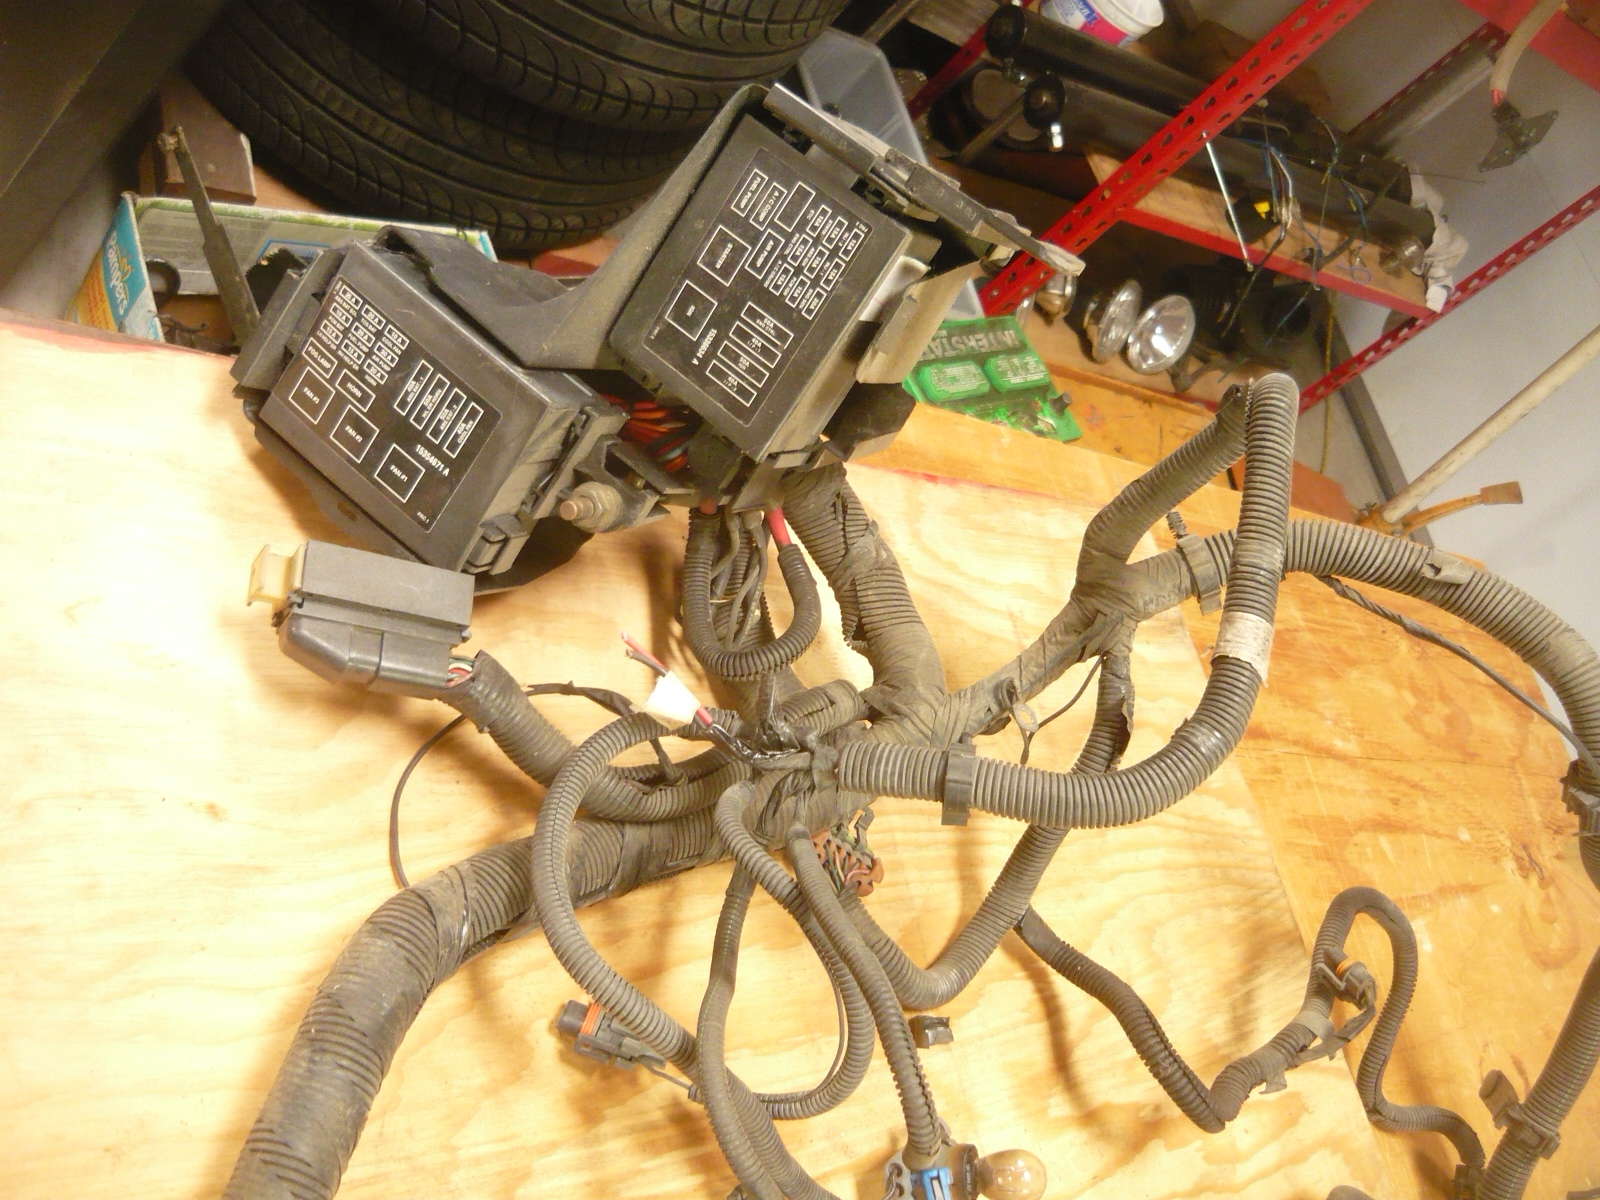
Wiring Since my last update, a lot has gone on with this car as I work front to back to give it the makeover it needs after 30+ years on the road. One part that I always have a good time with on these projects is wiring (yes, that’s what I meant to say- wiring). As many of you probably know, here in California, any car that is 1976 or newer has to be emissions tested every 2 years for registration renewal and also every time the car changes owners. This car, a 1988 model, still needs to be tested regularly. Also because it has an engine conversion, California requires that the car first go to a special state-run emissions station (called the referee) when they inspect the car for not only emissions levels but also that California legal parts have been used. Any emissions related parts used on conversions need to be either from the original manufacturer (GM in this case) or California aftermarket approved, a process where the state certifies that the aftermarket pieces do not degrade emissions. Getting to the point here, it has always been a gray area as to whether aftermarket wiring harnesses, such as what we might use to control our LS engine for example, are California legal (vs the GM originals that come in the donor cars). I’ve never been able to get a definitive answer on that. To not have to deal with that uncertainty, we have always used (only) GM factory wiring for all of the cars built here which we know then that they are by definition legal (the donor car, with this wiring, was emissions legal originally). One other benefit of using the original GM wiring is that should any troubleshooting or repair work be needed in the future, the factory GM manual can be used and will show exactly what is on the car- there is no need to “remember” what was done. The documentation exactly matches the car, down to the wiring colors and connector locations- that is not always (and often not) the case with aftermarket harnesses, assuming they come with any wiring schematics at all….. Anyway, getting back to this car in particular, we’re installing a 2002 Camaro LS1/T56 and will reuse the factory wiring for this build. The 1998-2002 Camaro LS1 wiring for the engine is actually made up of 2 harnesses- 1) the engine control harness that connects directly to the engine/transmission and the ECM, and 2) the engine compartment harness that also has the fuse and relay panels for everything under the hood (engine/trans, headlights, wipers, cruise control, ABS control, etc.,.). There are 3 connectors between harness #1 and #2, and it’s very convenient to keep the fuse/relay panels in harness #2 as they are relatively small and give us what we need without further work. However, harness #2 has all of that extra stuff we don’t need (headlights, wipers, cruise control, ABS control, etc.,.), so that all will be removed. That is a very straightforward process of removing the split loom on the outside of the harness, identifying the different connectors we wish to remove, and then extracting them and all of their associated wiring. In the end, harness #2 ends up about half its original size, which makes it much easier to route as we need it. Below are some pics of that harness laid out on the work table in standard form and them a pic on the same table after the extraneous wiring and connectors have been removed.
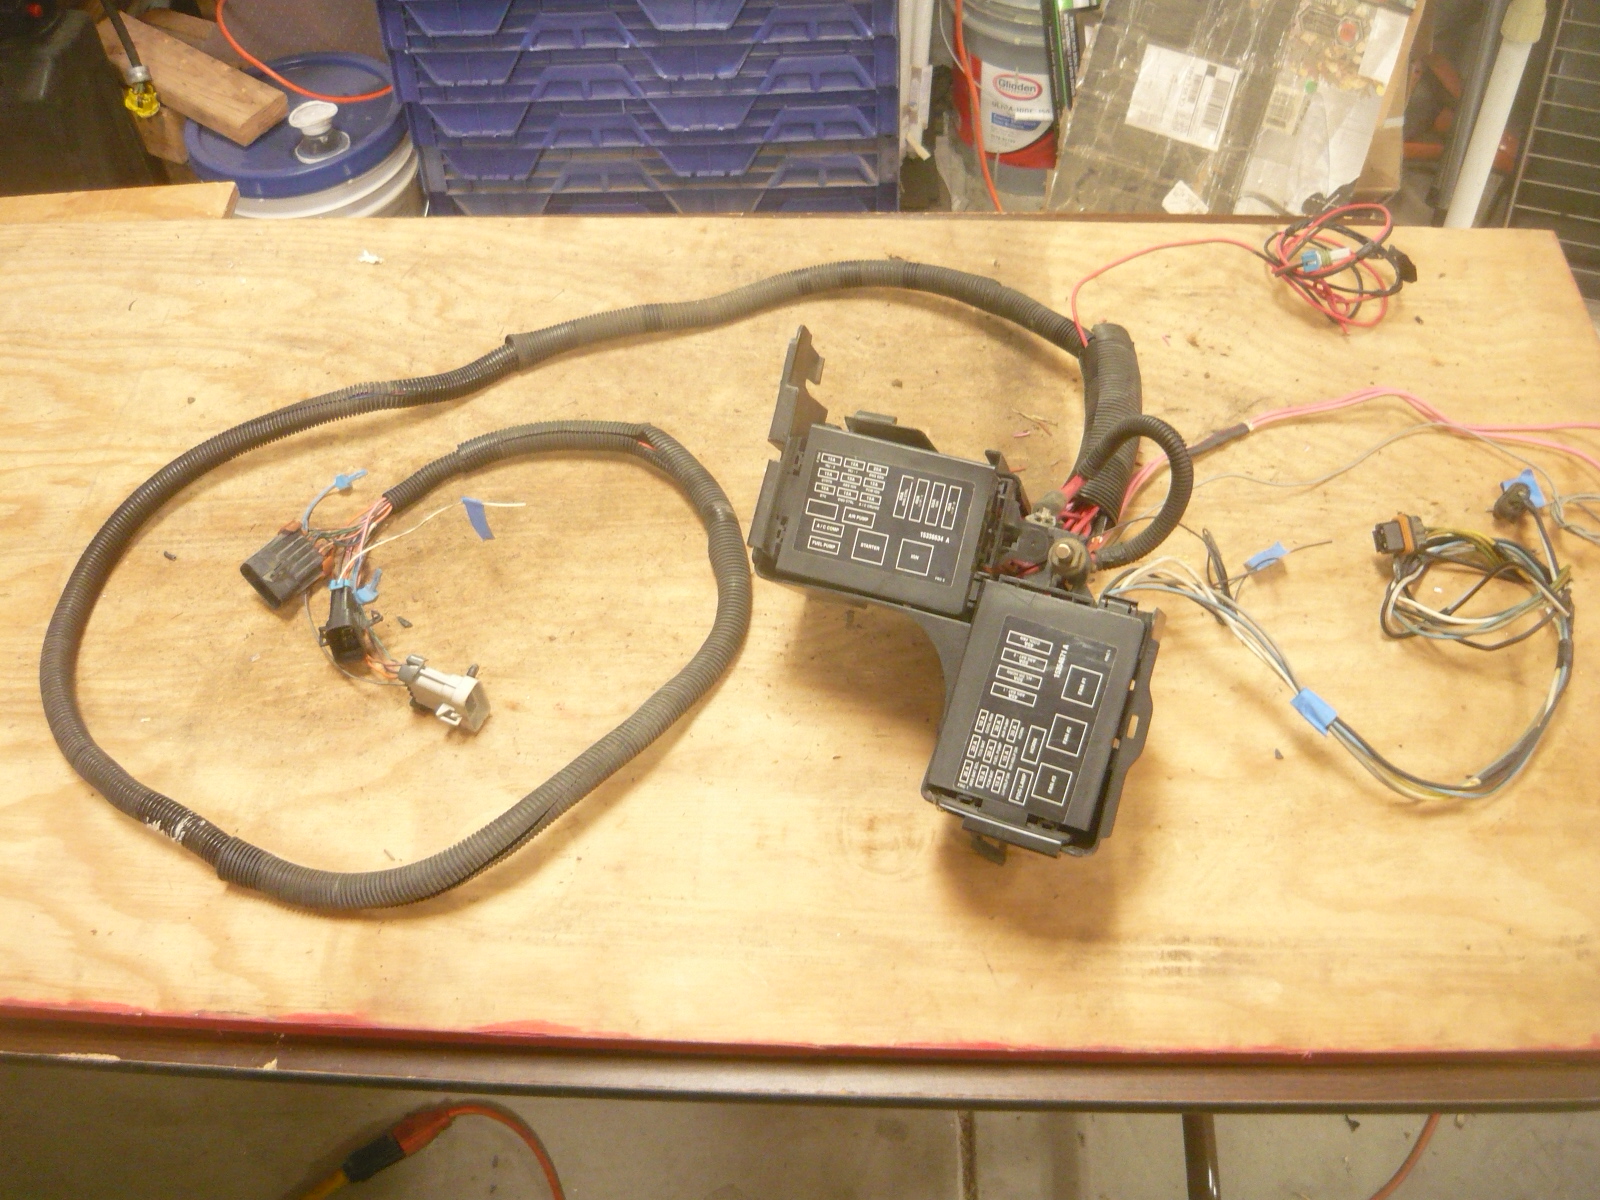
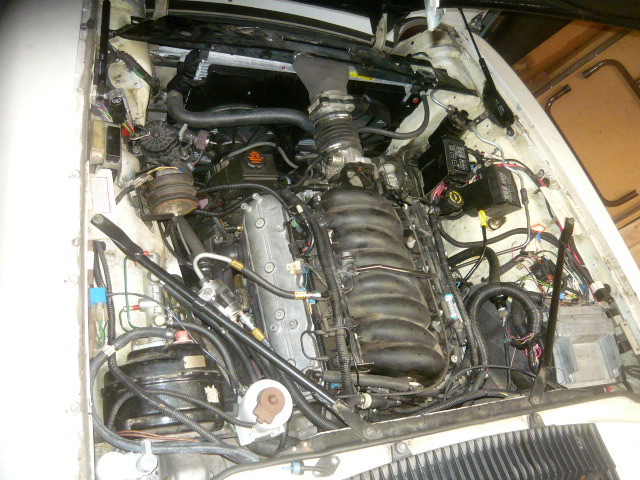
This has been considerably slimmed down, leaving essentially the 3 connectors to the ECM harness (left side), the fuse and relay panels, the leads to the electric fans (middle right), and the wiring to the electric air pump (top right). The heavy gauge pink wiring at the middle right is the ignition power feed to the fuse panel, and we’ll route that to a relay controlled by the Jag ignition switch. Getting to the overall layout of the wiring in the car itself, as we swap it into the Jag, we’ll put the ECM in the same basic location it was in the Camaro donor (right rear of the engine compartment) mounted on a slightly modified GM ECM bracket where the Jag windshield washer bottle originally was. In the Camaro, the 2 fuse/relay panels mount in the left front of the engine compartment, just outboard of the radiator. For the Jag, we’ll put them on the inner right fenderwell, ahead of the ECM, halfway towards the radiator. Doing this will require shortening the wires to that fuse/relay panel, but it’s not an excessive amount of work (since the harness was slimmed way down in a previous step). In total 12 wires get shortened which is no problem for the soldering iron and heat gun (for fuel injection wiring connections, always solder the wires together and also use heat shrink tubing on the connections- electrical tape is a no-no; not reliable). Here is a pic of the finished wiring assembly in the car all mounted and ready to move on. It came out very tidy and neat, and again, when we need to do any work on the car in 5 years, all we need to do is crack open the factory GM Camaro manual and everything will be exactly as in the book. Now getting everything into the car is pretty basic. This pic shows the nearly completed wiring harnesses in the car, ECM mounted, and those fuse/relay panels in accessible but safe places. The ignition coil packs will go right onto the valve covers- I left them off for now to give a bit more space as the exhaust manifolds go on and exhaust work starts (in a future installment). And if you look to the top of the pic you can see the air intake work midstream. Teaser- this will be a California legal free flow intake system from K&N, made for the Camaro application. We'll adjust the surrounding hardware so it fits the XJSC as well.
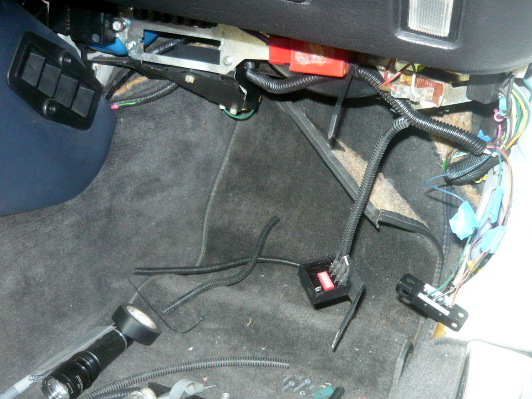
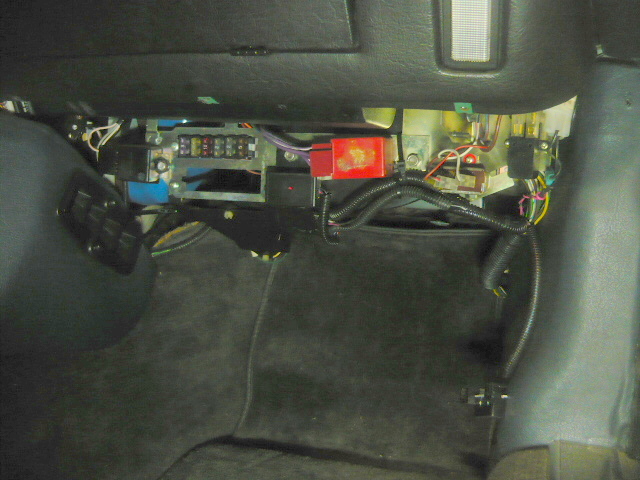
Lastly on the wiring, here are some shots of the interior of the car. So we are feeding wiring for the tach feed, ALDL (OBD2) Connector (you can see it hanging down on the right there), fuel pump connection, and even the VATS input through the right front fender rear passage area (just as was done when the car was originally converted with the LT1 15 years ago). You may wonder why the feed for the VATS (GM anti-theft system) is being retained- that allows me, if I want, to run completely standard programming on the LS1. For the very specific emissions requirements here in California, that will be helpful in getting the conversion approved by the state. One other thing to point out is the cube-like item with the red at the center is our new tach module. This is a newer item that comes from a new supplier who replaced our original supplier who suddenly decided to retire (one of the risks of this business- we work with several smaller niche suppliers and occasionally this happens...). The last shot shows the tidied up under dash area ready for the last under panel to go on. The black rectangular unit with the red dot in the center (just below and to the left of the red relay) is the VATS bypass module (so we can run the engine with standard programming); the tach module is behind it.
A note on programming- so here in California we will of course leave all of the LS1 standard emissions hardware and controls in place- front & rear O2 sensors, evaporative system (there is no EGR on 2001/2002 LS1's), stock GM catalytic converters, etc.,. The only changes in programming are superficial- tire size and axle ratio (to match the car- actually less of an issue on manual shift cars since we are switching gears ourselves- very important on the automatics to get the shifts right), and I like to slightly lower the cooling fan set points- to 195˚ low speed, 205˚ high speed (the factory settings are too high for me and they have no impact on emissions anyway) That’s it for now. In the next installment we’ll get into the front suspension rebuild, late model XJS steering rack installation, and front brake refresh… Questions or comments?? Send me an Email: andrew@jaguarspecialties.com Talk to you soon, Andrew
|