Telephone: 408-839-5569
Email: (Click Here) Andrew@JaguarSpecialties.com
Last Update 7-2-24
|
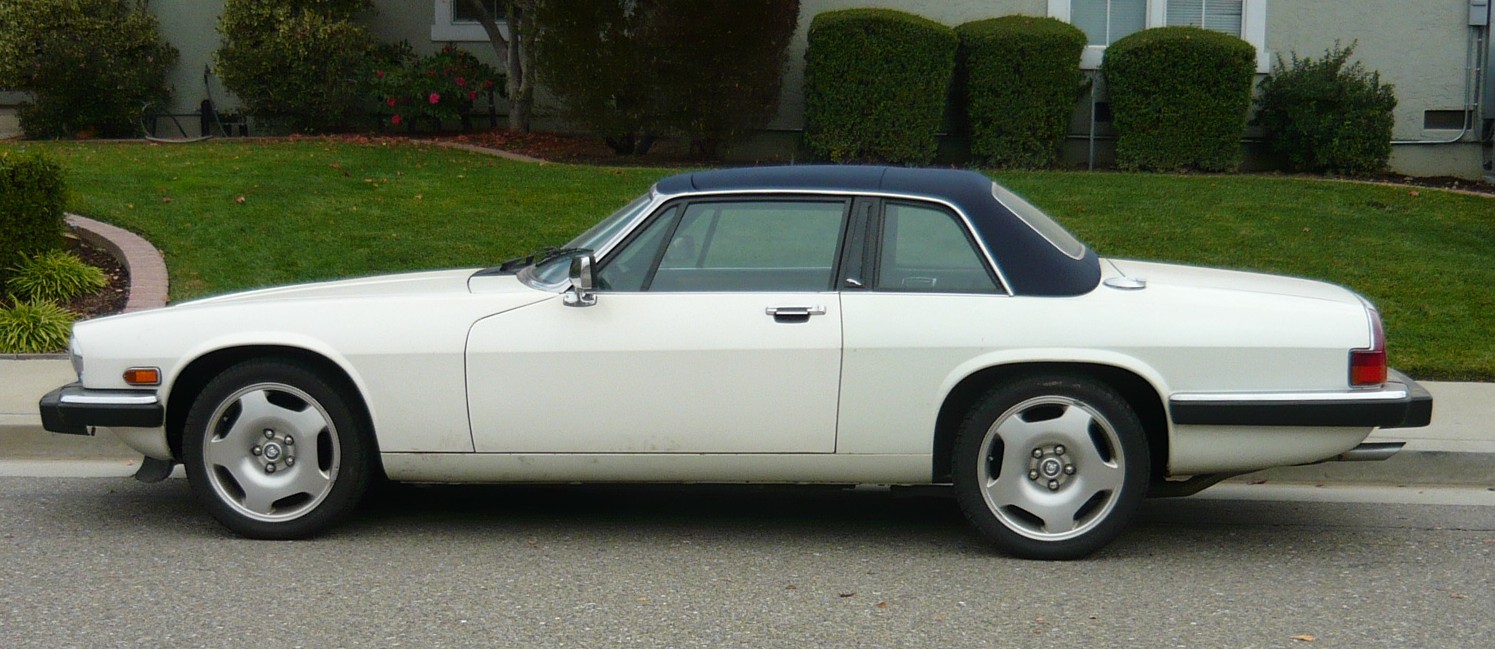
Our 1988 XJSC goes LS, and and
some other things are happening too..... XJSC LS Upgrade, Part 2 Go on to XJSC LS Upgrade Part 3, Click Here Go on to XJSC LS Upgrade Part 4, Click Here Go on to XJSC LS Upgrade Part 5, Click Here January 2019
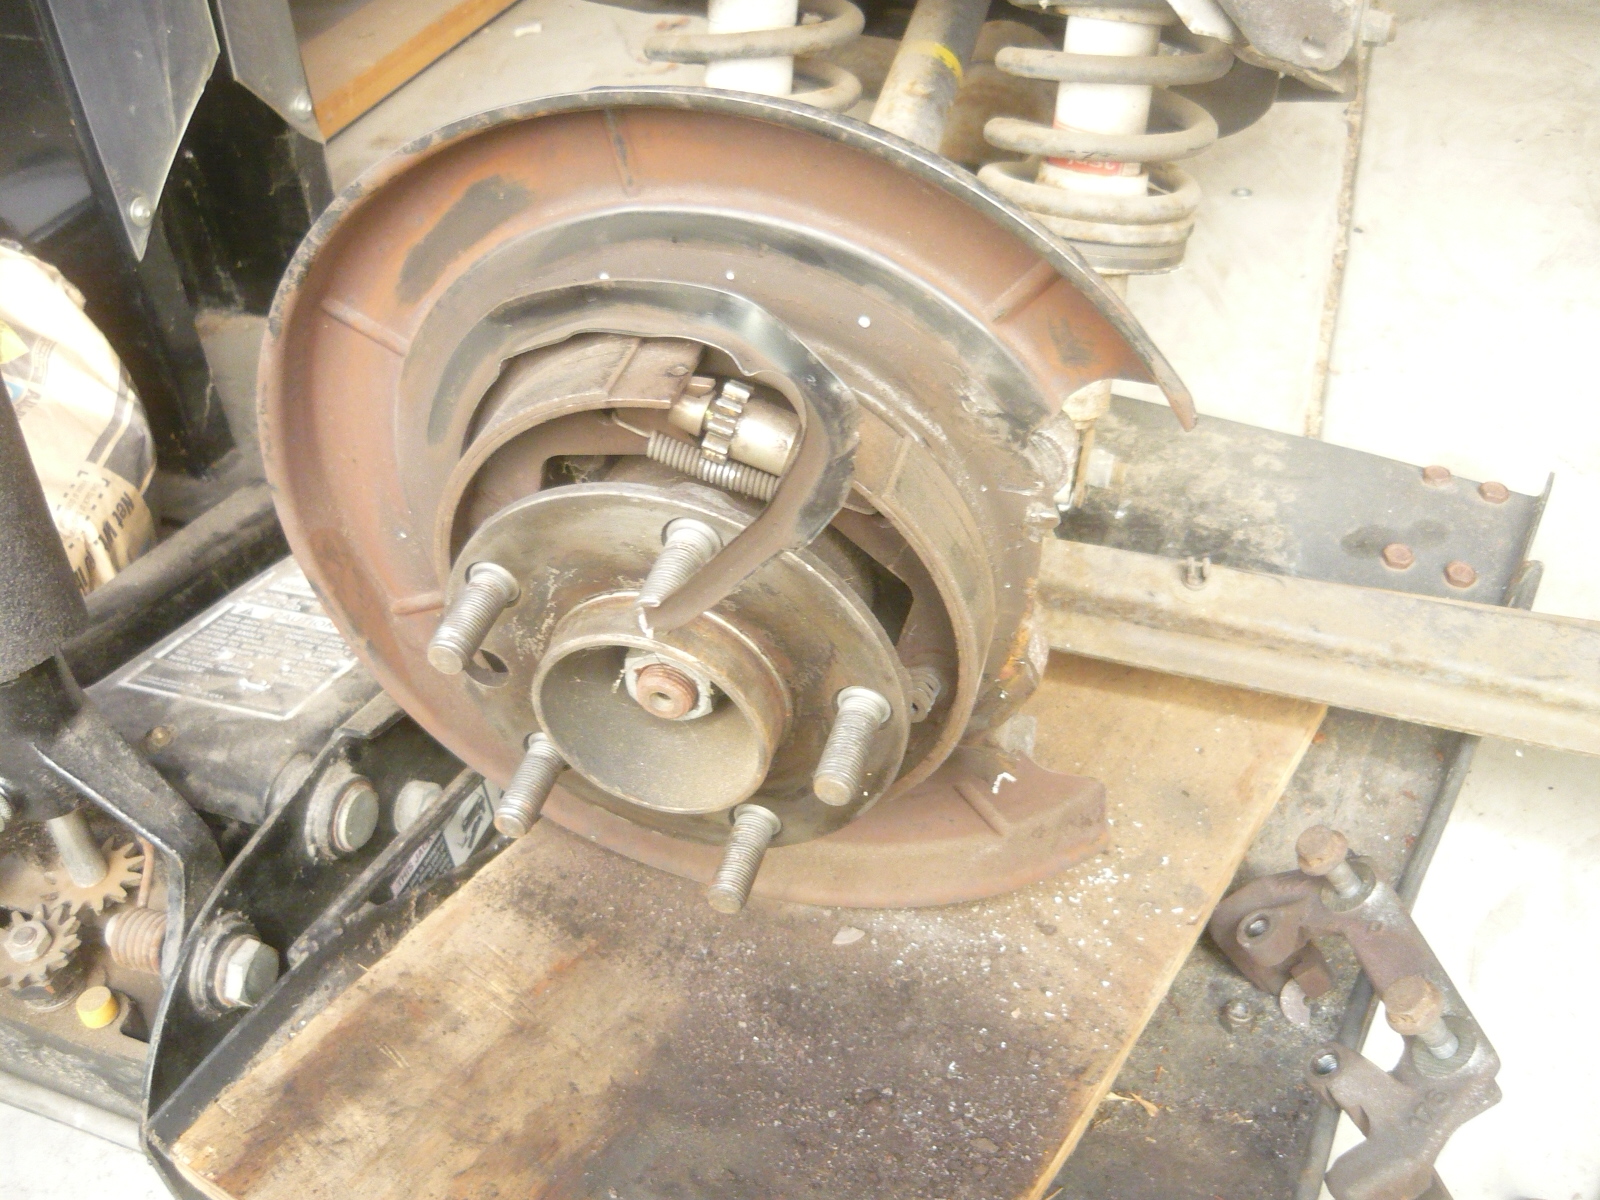
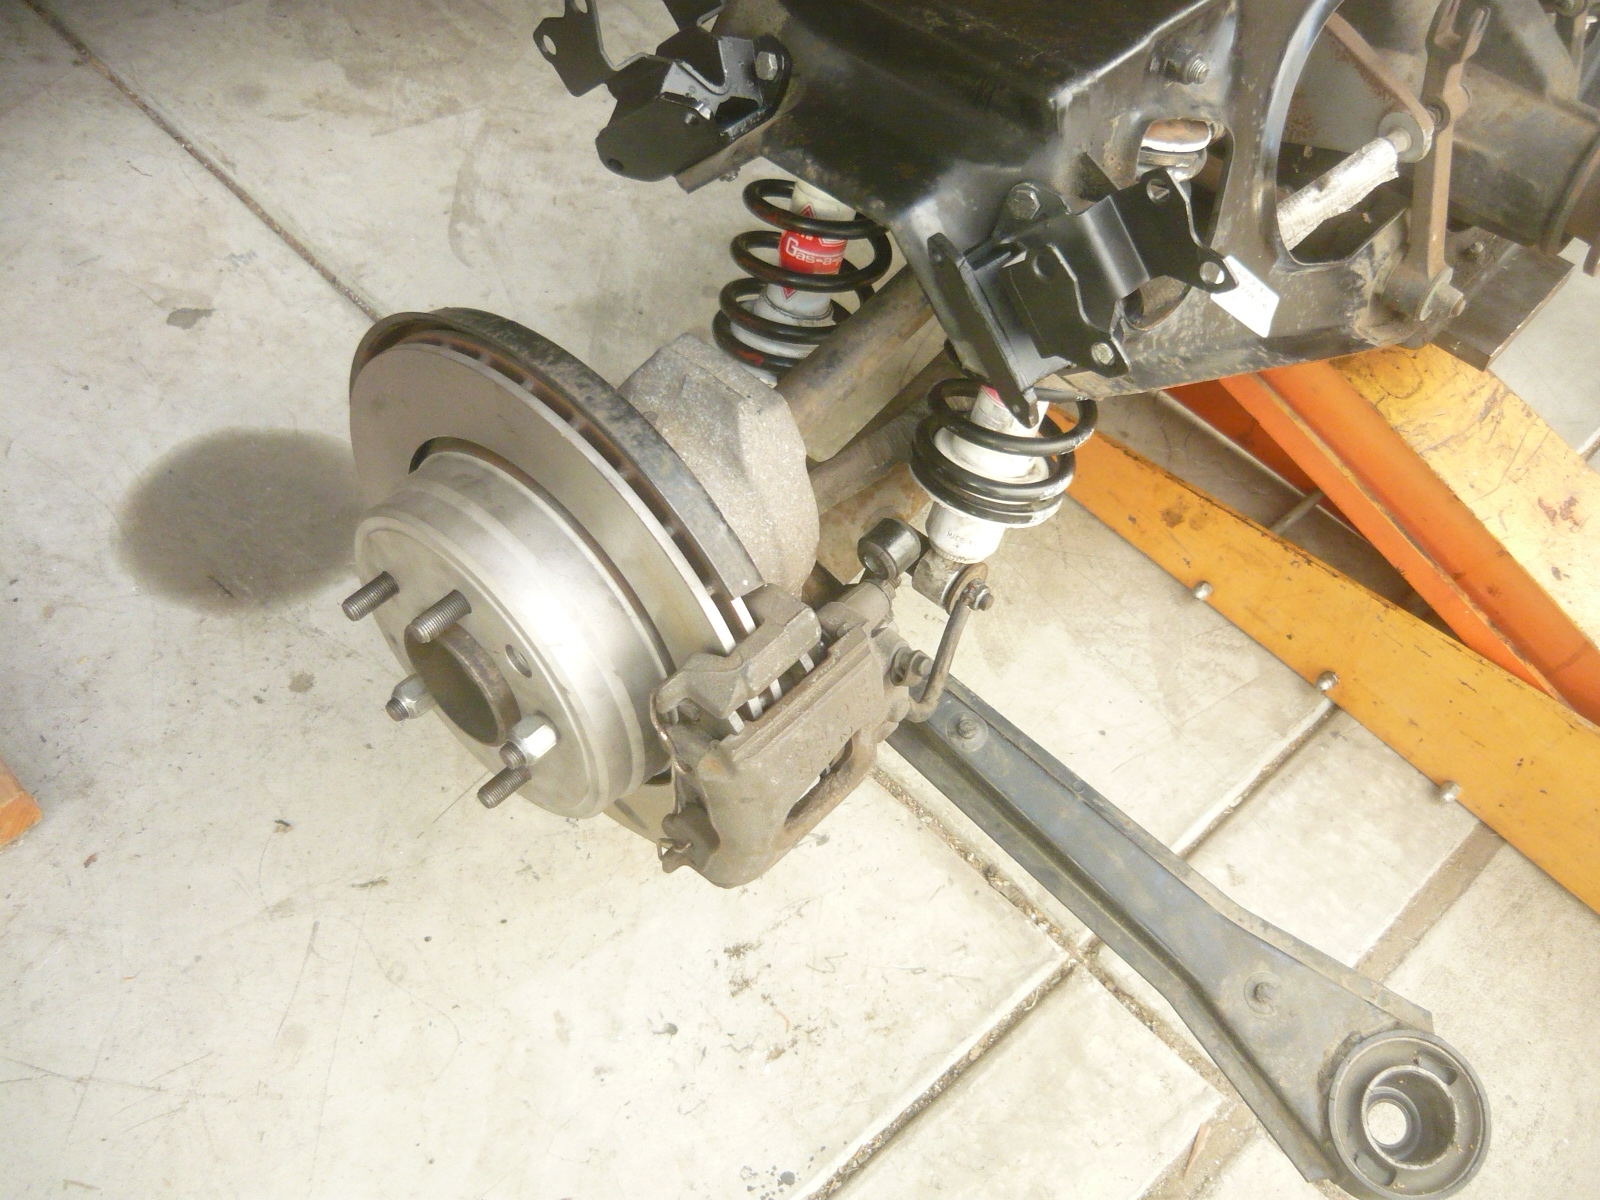
So as I mentioned in the first installment of this series, besides the LT1 conversion that was done back in 2003, this car was/is basically all original. It had been reasonably well taken care of before I bought it (by Hornburg Jaguar in SoCal, probably one of the most well known Jaguar dealers in California). That's all well and good but after 30 years on its feet, it was time for refreshing. Rear Brakes I've been tinkering with these cars now since 1992 and one of my earliest memories of them (my first Jag, an 85 XJS coupe) was having to drop the rear suspension to rebuild the inboard brakes. Considering what a chore that job is for a first timer like me back then, it's amazing I still like the cars at all. It was a pain, and I've been through it maybe 2 or 3 other times on other XJ's I owned since. As a counterpoint, I've been also tinkering with the later XJ40, XJ8 and XK8 cars and doing any work on their outboard rear brakes seemed like such a treat- you can get to everything, easily. It seems Jaguar saw the light too for the late XJS cars and from 93 1/2 onward, all of these models also went to outboard rear brakesl. And on those models they also included an upgraded (with better side/output seals) 3.54 posi Salisbury/Dana diff. Jaguar being how they are, much of what they produce is backwards compatible, so I found a nice 95 XJS rear suspension to go back into this car. That's an upgrade worth doing- going from 2.88/inboard brakes to 3.54/outboard brakes. My XJSC would be very happy. Now one thing I didn't realize is that there are actually 2 different styles of rear brakes on these models: solid rotors from 93 1/2 to 95 and then in 95 1/2 onward they went to vented rear rotors. Well the rear suspension unit I ended up with had solid rotors, so those had to be upgraded, which meant different calipers and rotors- ugh, where was I going to find those?. Remember what I said about Jaguar's later parts being backwards compatible?? Sitting around from another Jag project was an extra complete XK8 rear suspension here; the brakes on that unit (vented), looked suspiciously similar to the 95 XJS units. A little poking around in the parts books showed that the vented rotors on the late XJS cars were the same as those on later XJ40, XJ8, and XK8. Voila, we had a donor. And the swap was basically a bolt in. One small modification required the removal of a splash shield, a small circular piece spot welded to the XJS brake backing plates, meant only for the solid rotors. Once the shield was gone (and with a tiny amount of trimming on the backing plates themselves around the caliper areas), the vented rotors slipped right on and the wider (XK8) calipers bolted perfectly in place. Here are some pics of the removal of the splash shield and then the completed assembly in place (with freshly turned rotors)
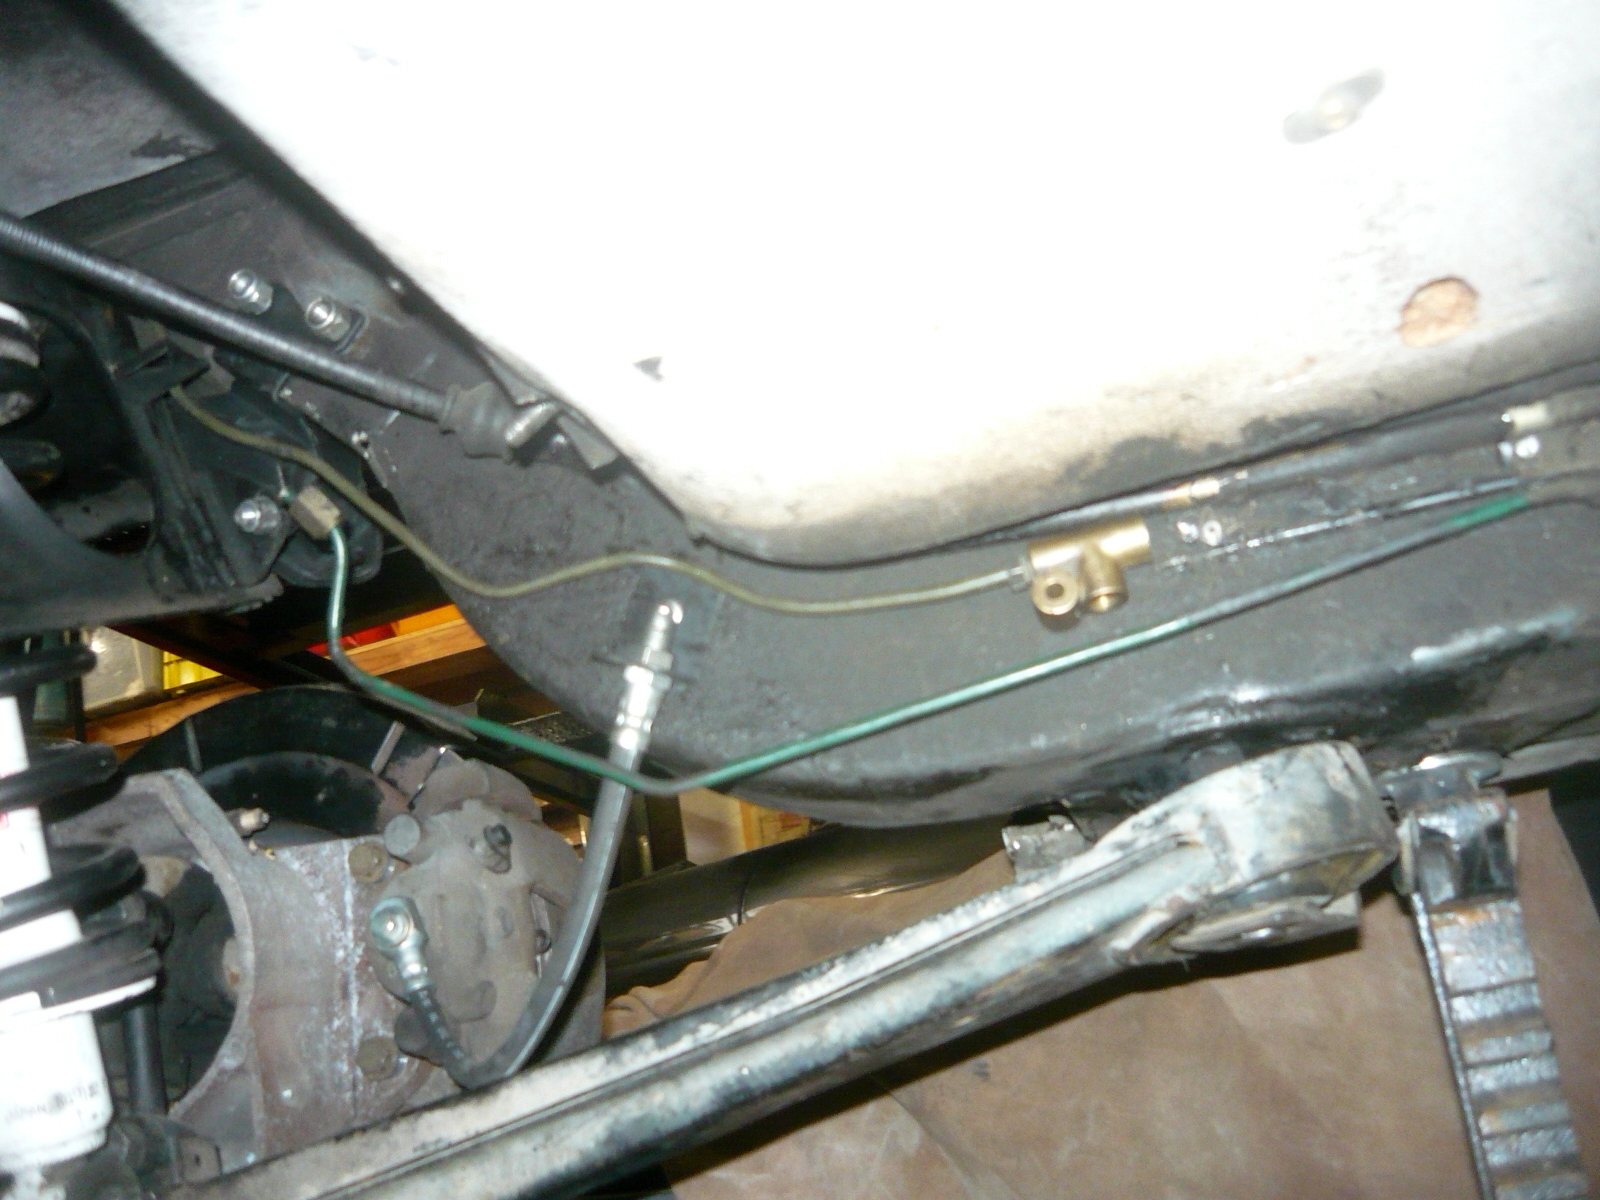
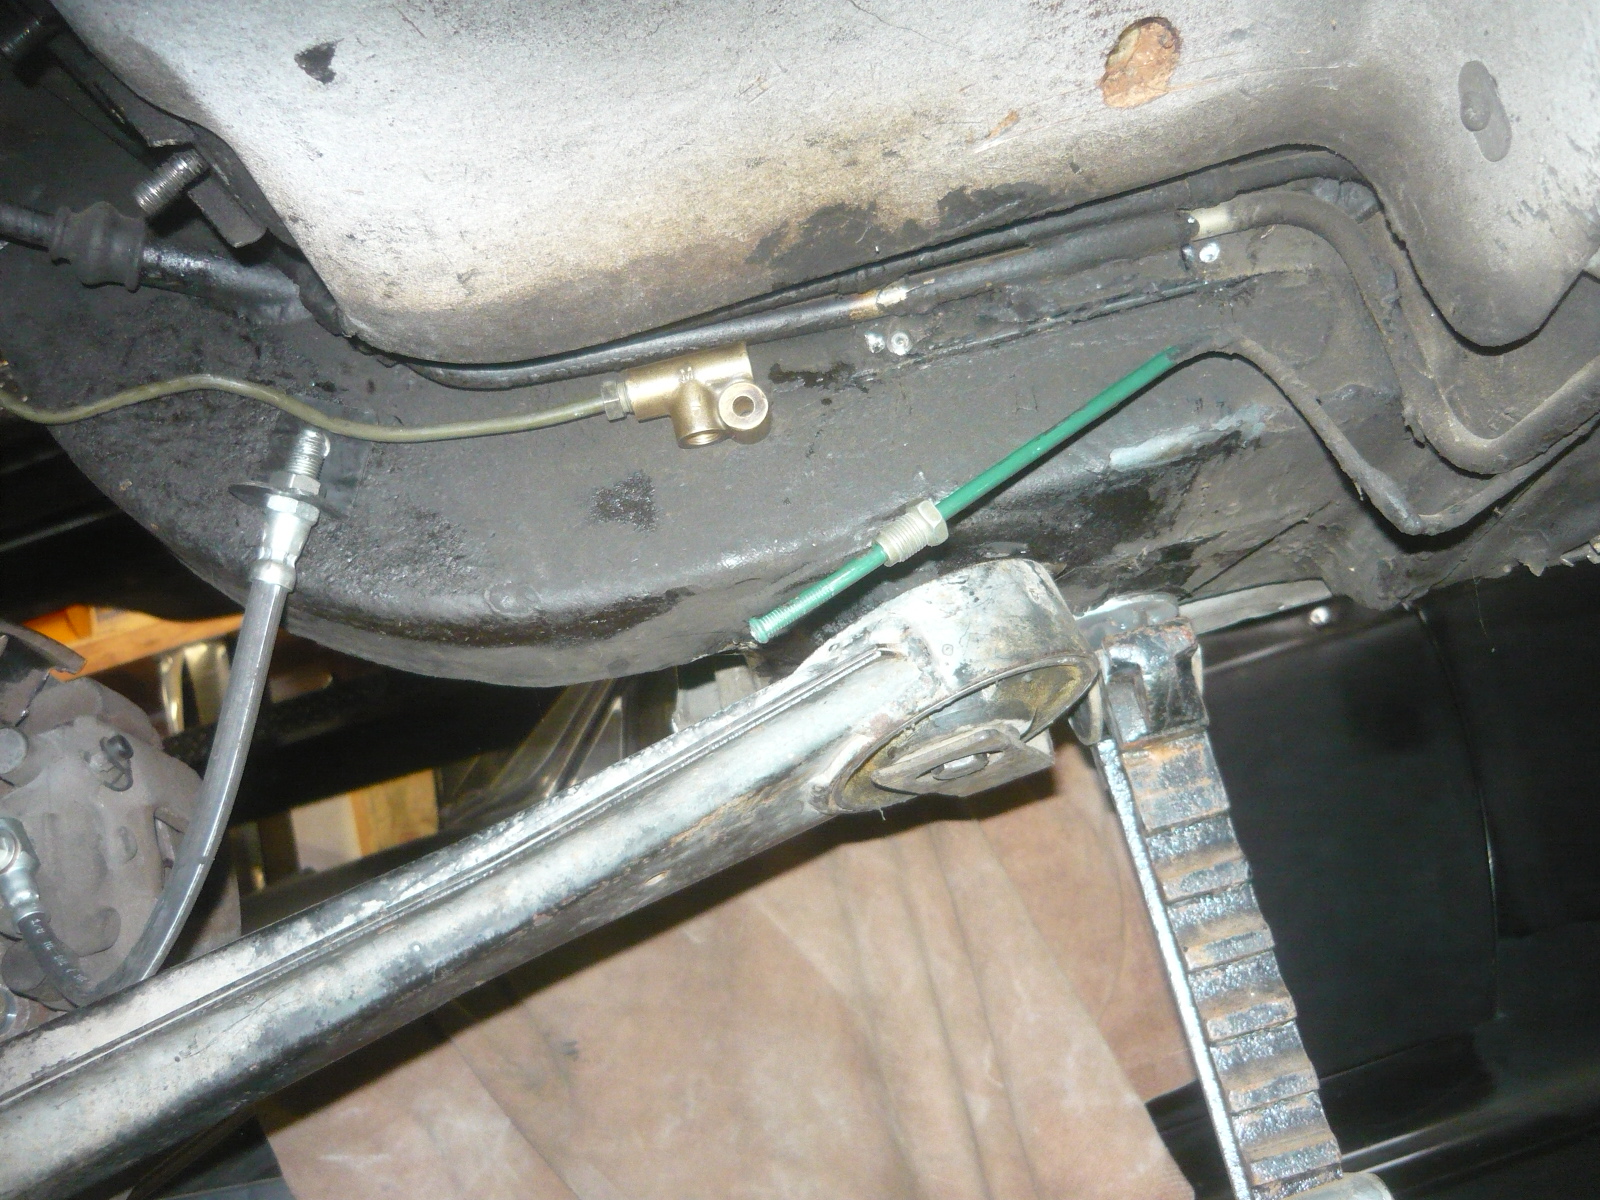
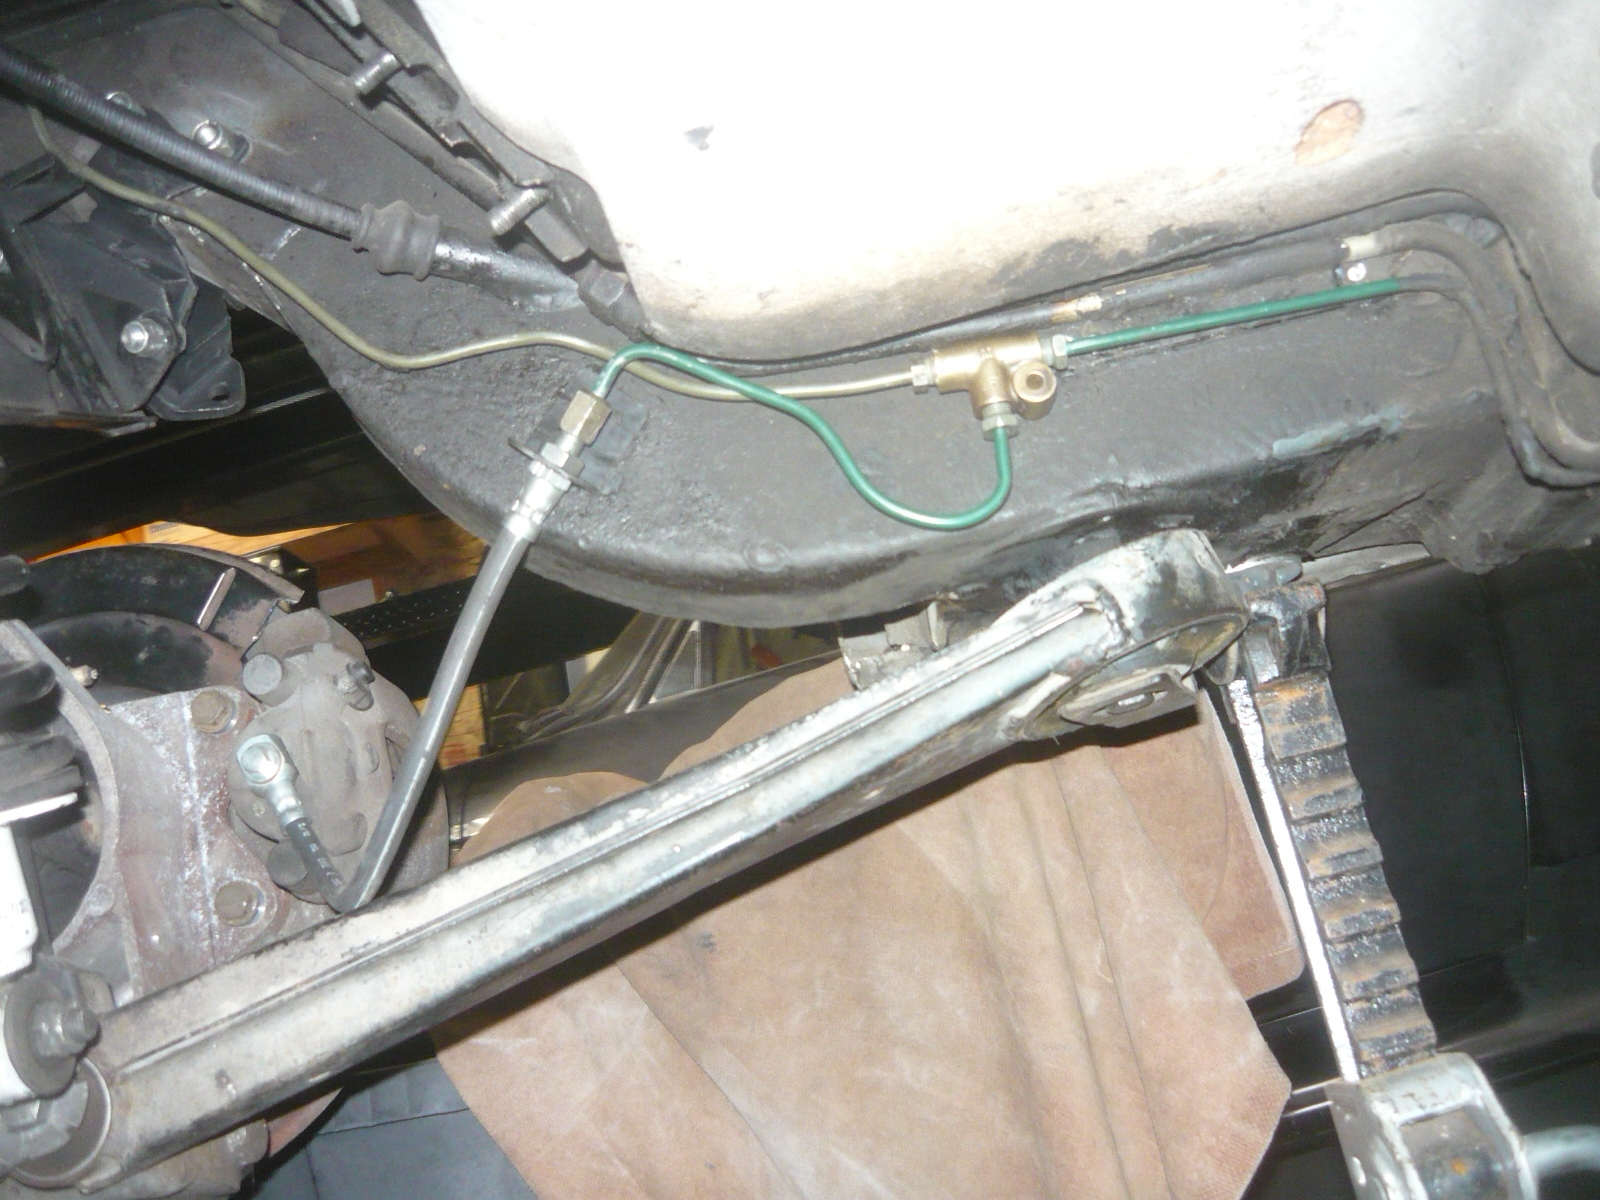
At this point the installation of the later rear suspension unit into the earlier chassis is nothing more than a bolt in. The later unit uses the very same surrounding cage, trailing arms (with rear sway bar link mounts as a bonus) and even the standard parking brake cable connects the same way. It's so simple. The only remaining area to deal with is the brake line plumbing. One important part to remember to get if you are doing this conversion is the main rear (transverse) brake line. The old brake setup (with the calipers rigidly mounted to the diff) required only 1 flexible brake line. But our new arrangement here has 2 moving calipers, so we'll need to 2 flexible hoses. And that transverse hard brake line mentioned above now comes in very handy as it can be reused to tee into the original rear brake line on the left side of the car and bring brake pressure over to the right caliper. This part the swap is also fairly easy- below is a pic of the original rear brake line (green) running on the inside of the left rear frame rail, and also the new transverse line mocked up with a tee fitting. We cut the green line, reflare it, and add a male threaded fitting (these are standard 10mm fittings from the auto parts store), making it ready to join to the tee, which you can see in second pic
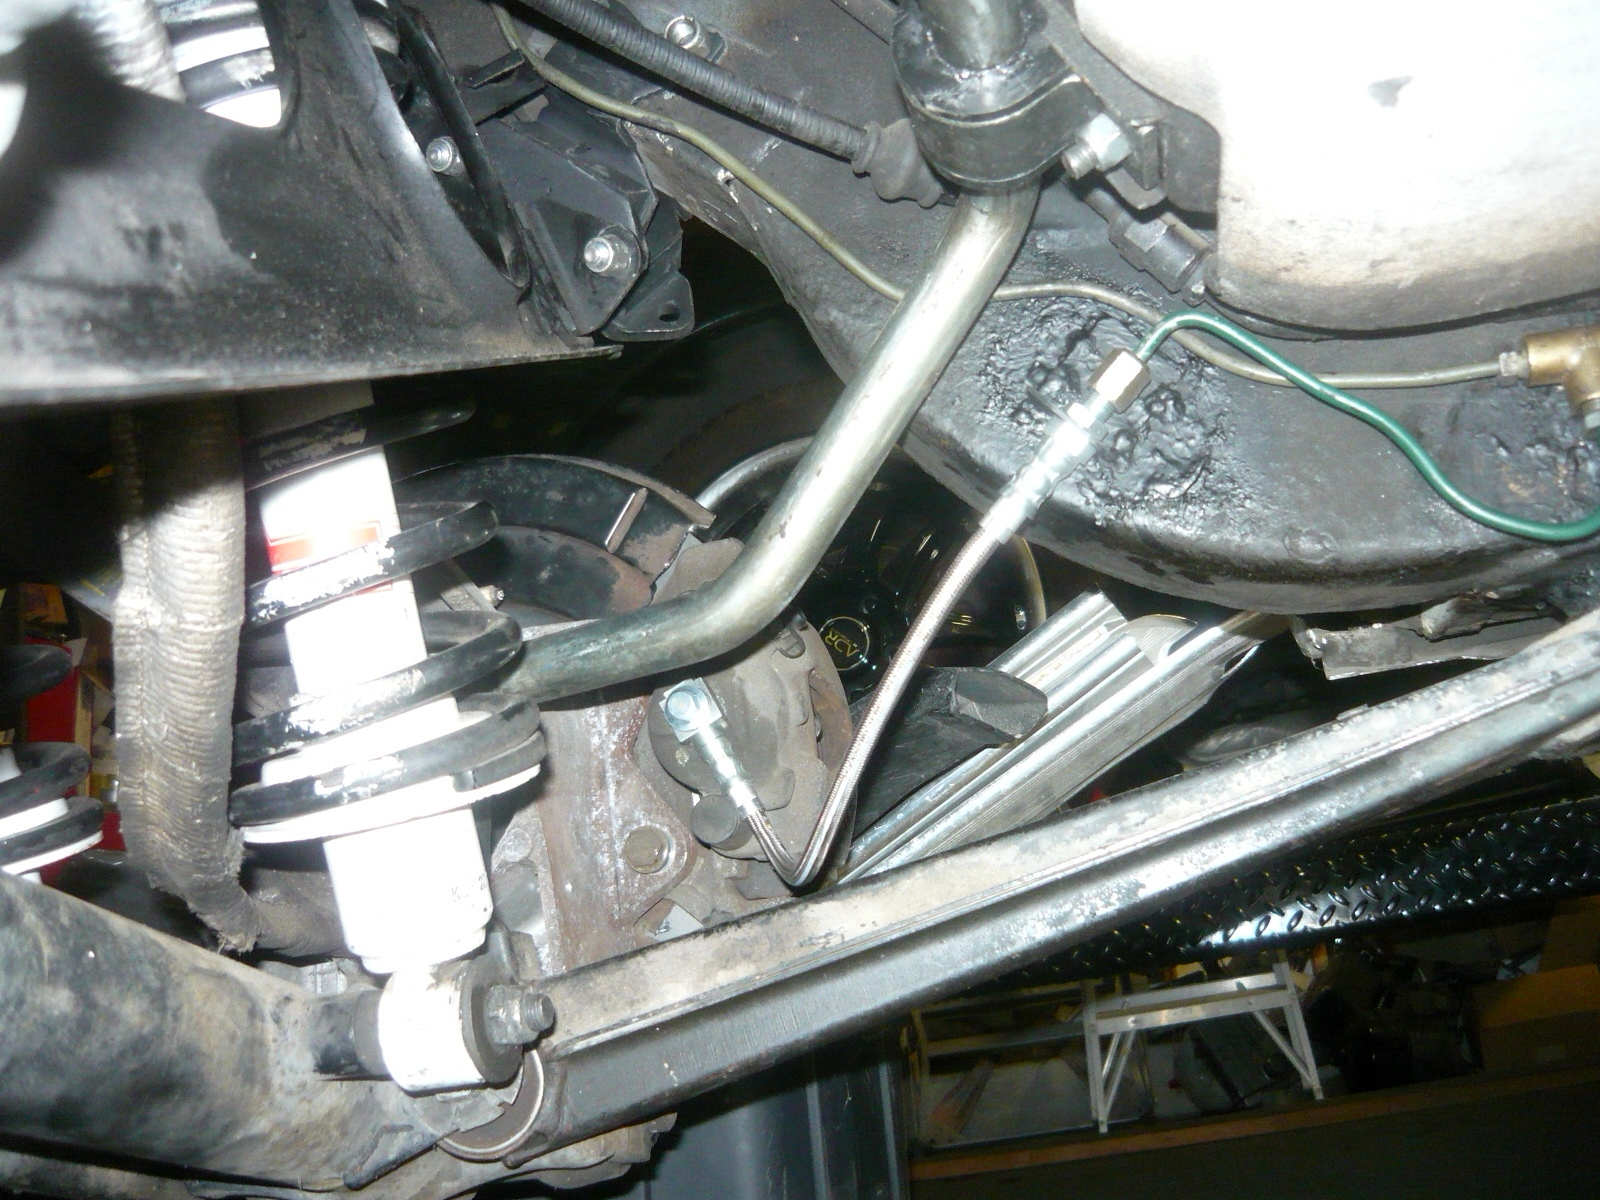
In both of these pics above you can see the new left side caliper and its new hose. For the connection of the hose to the tee (on the left side) and the hose to the transverse line (on the right side), all we need are 2 small steel L-brackets to feed the threaded ends of the hoses (and secured with regular nuts). Then an actual hard line can be run from the bottom of the tee to the hose end (left side) and the right side hose connects directly to the transverse line. On both sides the L-brackets can be either pop riveted or spot welded to the frame rail (I welded these). Here's the completed left side If that S-shaped green line from the bottom of the tee looks familiar, it should- it's made from the section we cut off the original green main line in the pic above.... The brake hose is standard 95 1/2 and later XJS.
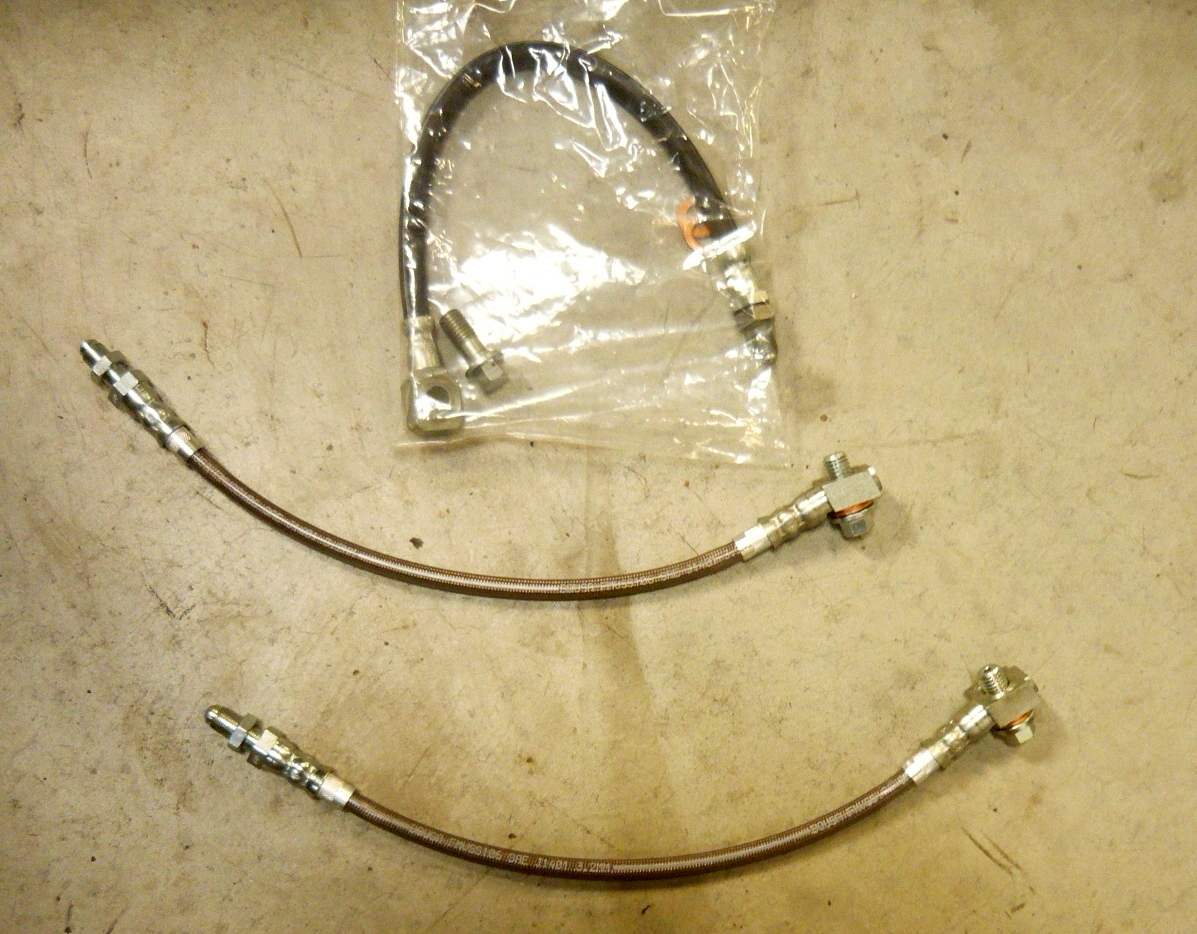
And a word on hoses.... So for years I had heard about the benefits of stainless steel braided brake hoses over the standard rubber pieces we are all used to. More specifically, the braided hoses are supposed to firm up the pedal as this material does not at all flex under pressure like the rubber pieces do. I had always been skeptical about that but one day out of the blue a fellow contacted me who was making a business out of creating custom hoses for different applications. Before you make a funny face about "making custom hoses" and is that safe, you should be aware that each of these suppliers, if they are legit, have a special ID number assigned to them which also is part of their crimping die. Every hose a supplier makes has his number pressed into the crimp fittings they make, or so he told me. To find out what the truth really is, I had him make me a set of hoses for my LS1- XJ6C. I gave him samples of the originals a few days later had a shiny set of braided stainless steel versions. The bolted in like stock and once the system was bled, sure enough, the pedal feel was stiffer. I was convinced. In the subsequent years a few more suppliers have come online to provide hoses. Nearly any application you might want is available off the shelf, or can be made. Flash forward ahead here to this project and it seemed only right to go the same route on this car, but after much searching, it seems no one makes the late XJS rear hoses (even though they are a standard Jaguar application) in braided stainless steel. One of our hydraulic suppliers is into brake lines now too and after sending them a sample, they easily made a pair for this project. The finished product is an identical copy of the original, down to the fittings themselves. Below are a couple of pics- the standard rubber hose with the new stainless steel braided versions, and the completed left side installation with one of them
Last step on brakes The last thing to do is rebuild these rear calipers so they can be bolted in forever and we're done.
Questions or comments?? Send me an Email: andrew@jaguarspecialties.com Talk to you soon, Andrew
|